Showing posts with label craftiness. Show all posts

Monday, August 26, 2013

Some more Illustrator play

I'm mostly just playing with live paint and the pen tool and finding my way.  Learning this sort of thing requires all kinds of practice.  And I'd rather practice this than clean my house.  (Not because I don't like a clean house, mind you.)


Because I'm an unabashed Jenny Komenda junkie.  


rsquoteaug


medallion-symbol

Creating a symbol in illustrator

lines-record-player

Playing with the shape tools in illustrator

leavesblobbrush

Coloring with the Blob brush

header3

An imaginary blog header for this awesome blog

Emilyhand

More pen tool practice.  practice practice practice practice. 

Friday, August 09, 2013

typography

I finally bit the bullet and am attempting to slip an Adobe Illustrator class under my belt before I start school in September.  (Mostly because I know I won't have time for any such shenanigans for the duration of my Grad program).  It's a four week class through Nicole's Classes, taught by Alma Loveland and I'm just eating it up.  It's beyond delightful to be able to create something that stays created when you have four tiny embodied entropies cycloning around your ankles all the time (sweet and beloved as they may be).  I cannot overstate how vital it is to my well-being to have some such creation going on.  (Nor, conversely, how destructive to my well-being the relentless, thankless entropy can be.  Counterattacks are appropriate).

So this, this is good.  My 1st week homework was to create a typography poster.  I created 3, because it's addictive.  They are nowhere near where I'd want them to be, but since I'm still learning what tools I have in my belt and how to use them, I'm going to be kind to myself and say it's a decent 1st attempt.

This is from the novel Housekeeping, which I just finished.  It is devastating and hypnotic.  Lots of tremendously deep thoughts, but not a terribly redemptive piece, all told.  


I love just about anything that flows from Brian Doyle's mouth or pen.  


From A Blog about Love, which is consistently outstanding.  And which everybody ought to enlighten themselves with. 

Wednesday, February 27, 2013

Mini Makeover for my bookshelves

While I had 3M poster-hanging tabs in the house, I elected to tackle another project.  When I ordered the boys' Valentines this year I also ordered some fancy gold-marbled handmade paper to line the inside of the living room bookshelves with.  The bookshelves got a bit beat up with our cross-country move, and a part of me still wants to paint them, but since Mr Renn is not on board with that idea, I decided I could at least line their innards and get a bit more contrast.  I used 8 pieces of this paper, and most of a box of 48 poster tabs.

My bookshelves have been pretty neglected since I first styled them after our move here.  They collect a lot of things I need to put out of the reach of little hands.  And they don't get thoroughly dusted as often as they should.  They'd kind of become a literal black hole in the room.  They're so dark.  So I hoped that lightening up the back would help everything pop a bit more.  I wish I could have found wrapping paper or a rolled paper wide enough for this, but as it was I had to deal with piecing the paper into place and camouflaging seams.


Untitled

They really are decent, hardworking pieces of furniture.  No particle board here.  And I didn't want to damage the wood, which is why I used the 3M strips.  I should be able to remove everything with no residue if I want to go back to the wood.  (Or if we ever decide to paint or re-stain.)  I took everything off the shelves, removed the shelves, and gave it all a thorough cleaning.

Untitled

Then I pieced the paper in there, cutting as needed in an attempt to minimize waste of paper, but also to minimize the placement of visible seams.

Untitled

Once the shelves were back in place, I did a little strategic planning.  All of my styling had to accomodate covering up seams in the paper.

Untitled

And we have plenty of books to cover up whatever needed it.  There's not actually room left to do a great deal of "styling" per se, we definitely have bookshelves for the purpose of housing books, but I think it turned out all right.  The picture doesn't quite capture the difference, but the shelves are visually lightened up quite a bit.  And it was a relatively inexpensive, totally reversible change.

Untitled

Tuesday, February 05, 2013

Plans for my Settee

My living room is an odd-shaped one.  The bay window is not at all centered with the useable portion of the room, and there are no normal sized walls to work within.  And so finding a way to situate furniture to invoke comfortable conversation became a challenge.  After trying a number of arrangement with one sofa and two chairs, I finally decided what the room needed was a settee.  Something large enough to seat two people, but a petite enough piece of furniture that it didn't have the bulk or weight of another sofa or a loveseat.   Luckily I found and picked one up before our Bunny was born.  And luckily I had one piece of furniture in the living room I could sit on with a puke-prone baby without worrying too much.

IMG_2685Jan2013demillebird_feeder_settee

But now that her spit-face days are numbered, I'm feeling ready to get the settee refinished.  I (naturally and predictably) fell in love with Jenny Komenda's new sofa:


And I immediately set to work tracking down sufficient yardage of a similar seafoam upholstery velvet. Now I just need to decide what to do the trim in.  A self-welt is always safest, but I'm leaning toward something with more contrast, especially since I'll be getting rid of the tufting.   I'm thinking the emerald/peacock color would be awesome, bold, and still pretty versatile.

Settee trim options #vscocam

I'm also having my upholsterer get rid of the caning and upholster the sides.  I actually like the look of the caning, but I don't trust it to hold up to my boys.  I've already seen that they're prone to picking at it.

The last thing I need to decide before I send it off for its makeover is whether to paint or stain the wood.   I'm not sure what I'd paint it, but I'm starting to feel like there's an overdose of stained wood in the room.

I'm so glad to be making decisions that matter so little.  But hey, despite their inherent frivolity, this kind of scheming sure makes for a happier me.

Tuesday, December 20, 2011

Christmas Stories: Nine Days to Christmas

20111220-IMG_9504

When Sir O's preschool teacher asked me to take a turn reading a Christmas story to his class, my immediate reaction was to choose Nine Days to Christmas. It's the perfect blend of culture and festivity and narrative, and we love it around here.  It's a cute introduction to the Mexican custom of Christmas Posadas, and centers around a very special star-pinata.

Christmas Stories

Because I was supposed to bring a stocking stuffer associated with my book, sir O and I set about making mini star-ornament-faux-pintatas.  Other than the 2 times I burned my fingers with the hot glue gun, it was a really easy and fun project.

I bought a tube of mini plastic gold ball ornaments, and a pack of gold birthday crowns at the party store.

9 days to Christmas ornaments

I used the points on the crowns to make conical points for the stars. (Use hot glue, not craft glue, fyi).

9 days to Christmas ornaments

Then I cut and folded slits to make a flat-ish surface to glue against the ornaments.

9 days to Christmas ornaments

5 cones for each star. They were not perfect, but for a project with a preschooler for a sidekick, I thought they were absolutely adequate.  And the kids in his class loved them, which is the most important part, right?

9 days to Christmas ornaments

Tuesday, May 03, 2011

a hopeful heirloom

I never did get to show you the blessing outfit we made for our Gentleman back in January.
It was a crazy labor of love.
I bought vintage italian linen and velvet ribbon and an out-of-print pattern for it.  (On an ambitious day) but then decided it needed to be lined (which, not being included in the pattern, is still beyond my comfort zone) so I had to call in reinforcements (in the form of my mother taking a day off of work to help me.)

I am beyond pleased with how it turned out.  I hope someday I get to see a grandbaby in it.

gentleman's baby blessing

gentleman's baby blessing

gentleman's baby blessing

Tuesday, March 29, 2011

up to my elbows in.....

Spent most of yesterday working on this with the HSF.
Isn't it pretty?
We make a comical bunch of amateurs, the HSF and I and our offspring.
There was a literal abundance of blood, sweat, tears, screaming, laughing, crying, and running in circles.
This is the lot of those mothers who want to get anything accomplished 
(you know, that lasts more than 10 hours).

Thursday, February 03, 2011

Because I need more little men

My kids are bored.
This is nearly always true of late.  But especially with temperatures below freezing and their sick baby brother eating up all of my attention.

a sailing we will go

So Monday while Mr Renn was making dinner (bless his heart) I dug deep to see what I had access to craft-wise. (I miss my stuff!) I figured that if I help Sir O make his own toys then he will be occupied while he makes them and occupied while he plays with them and it sounded like a win-win.

So, he helped me make these tiny waldorfian men.  I figured that since we've been reading The Tomten and Under a Mushroom that he'd have something to base some imaginative play on and hopefully, hopefully be content without a screen in his face for some stretches of time.

So far they've been very short stretches of time, but I'm clinging to hope.

Wooden bases and felted wool were purchased on etsy.  Just search for Waldorf under Supplies.  I'm not a whole-hog lover of all things Waldorf - but I think parts of it are splendid.

Thursday, December 23, 2010

nothing says Christmas like eggnog and ribbon

I got it into my head to try making homemade eggnog this year, so I contacted the three people I know of who have made eggnog before, and all three pointed me to this recipe.  I was making it for my little sister's Sub-for-Santa party, so in the interest of feeding teenagers  I went the cooked route and substituted a little (2 tsp) imitation rum extract for the bourbon.  Jeff's recommendation to allow 1 egg per person when figuring out quantities for the recipe was spot-on. I also warmed my egg whites in a glass bowl over simmering water before beating them so they were raised to a "safe" temperature as well.   However, since the "foam" was not terrifically popular with my audience, I think next time I'll just make peppermint meringues with the whites and serve them on the side.

eggnogness

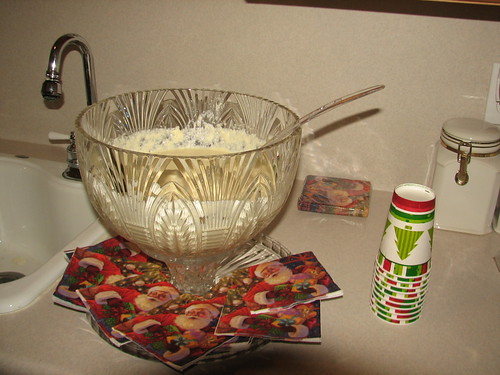
Have you ever tried homemade eggnog?  You'll never go back.

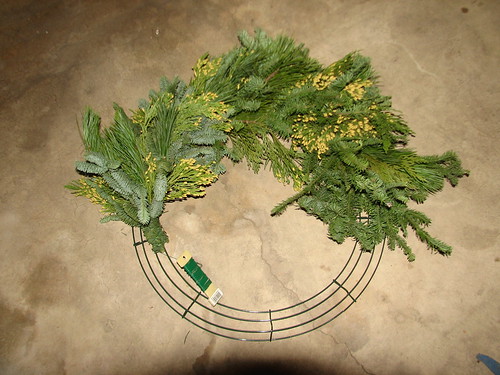
Also - I've had requests to see the bows I've been cranking out this Christmas.  I thought about making a video - but there's no one but me to hold the camera.

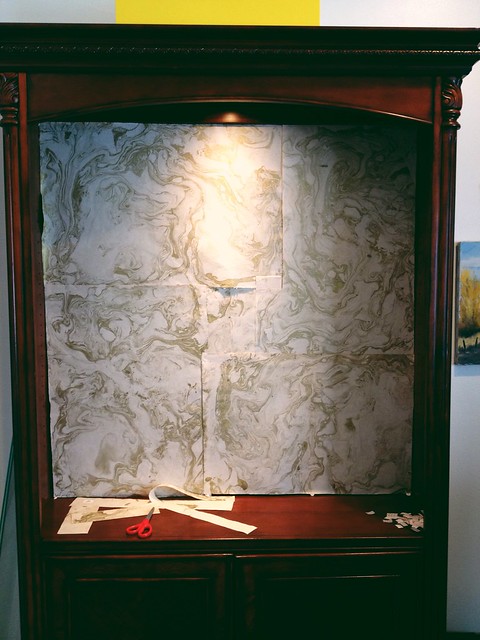
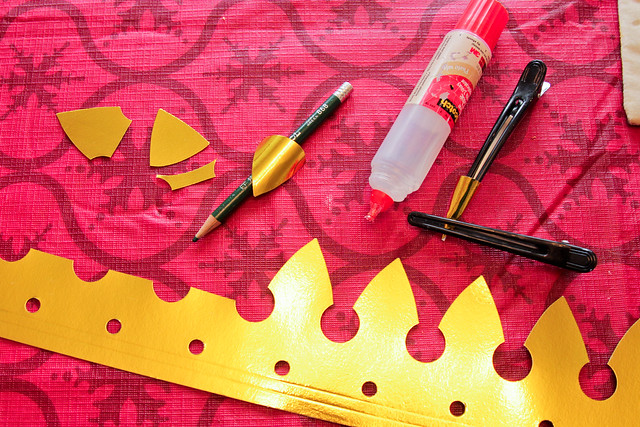
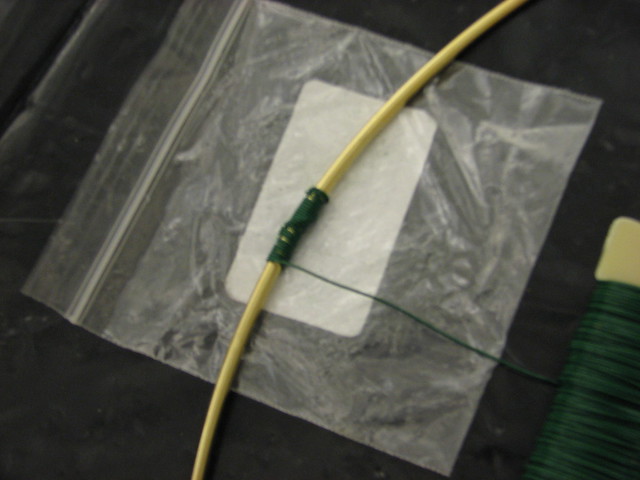
Supplies: wrapped present, scissors, and lots of ribbon.  It needs to be double-faced and preferably wire-edged.  Also optional is some fine gauge wire. (If you want to re-use your bow I recommend the wire)

bow supplies

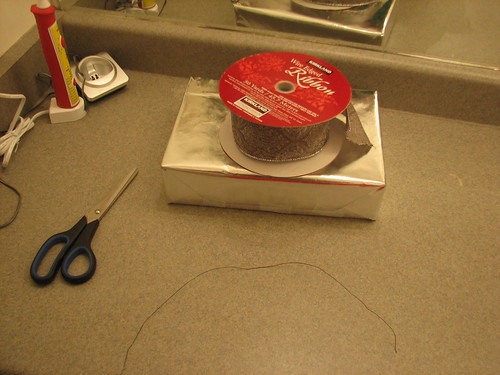
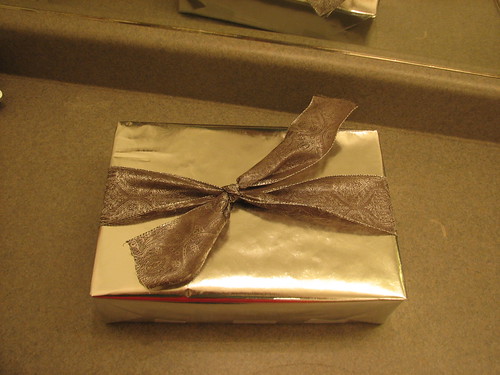
Begin with a piece of ribbon cut and tied in a square knot around your package.

prepared present

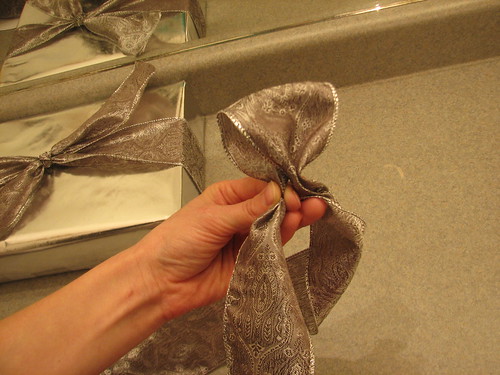
1.) Allow a tail for your bow, then fold/pinch the ribbon between your fingers.

step 1

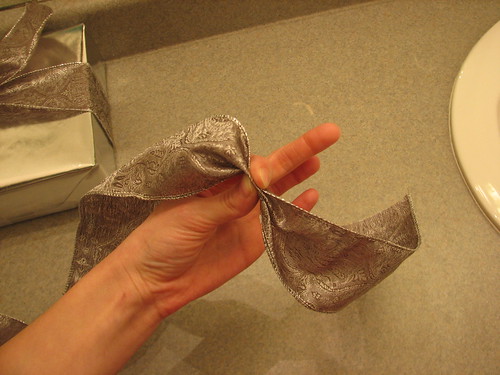
2.)  twist the lead of your ribbon 180 degrees, and keep the twist of the ribbon within the part of the ribbon you are pinching.

step 2

3.)  fold over a loop of your ribbon proportionate to the size of bow you want and then bring the ribbon back into your pinch and twist again.

step 3

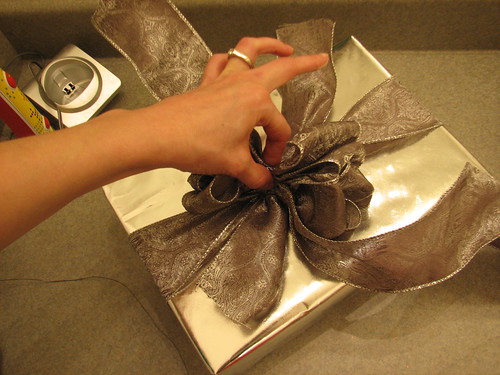
4.)  repeat this process until you have at least 5 loops on each side of your pinch.  Make sure you finish with a tail on the opposite side of the pinch from your initial tail.

step 4

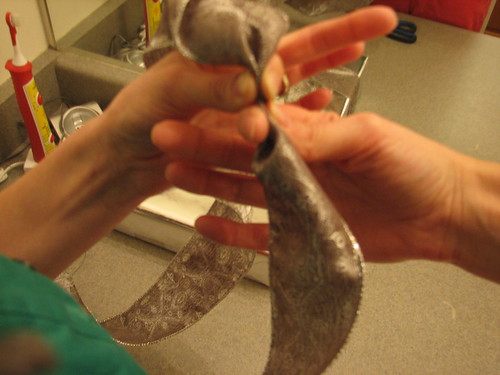
5.)  at this point you can wrap and twist your fine gauge wire around your pinch, Or you can just tie a knot or double knot around your pinch with the ribbon already on  your present.

step 5

step 5

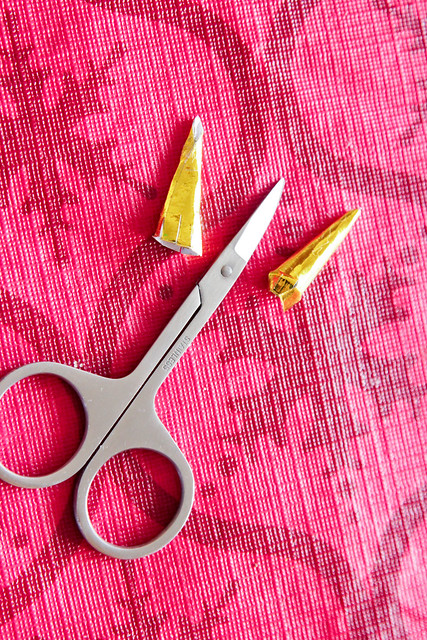
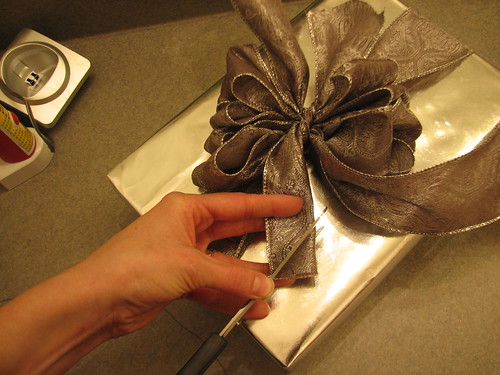
6.)  Cut all your tails into inverted V's by folding them in half then cutting on an angle.

step 6

step 6

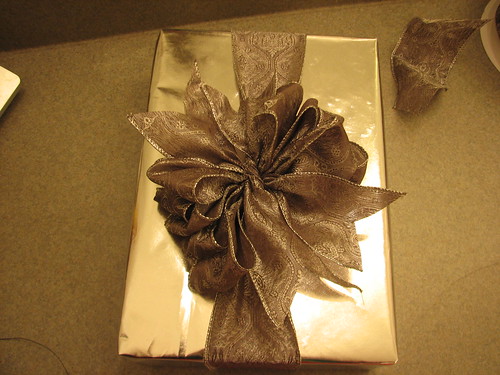
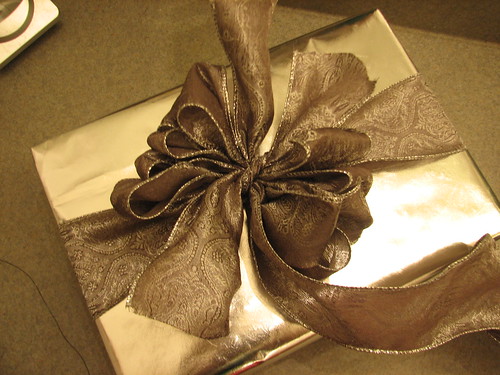
7.)  Now you preen.  Adjust and poof your loops around until they resemble a dome shape.  Crush each loop a little for a fuller, crinkled effect.

step 7

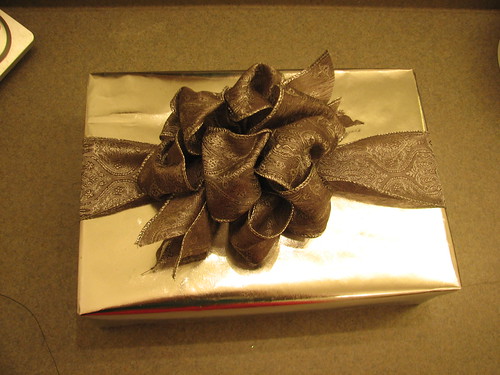
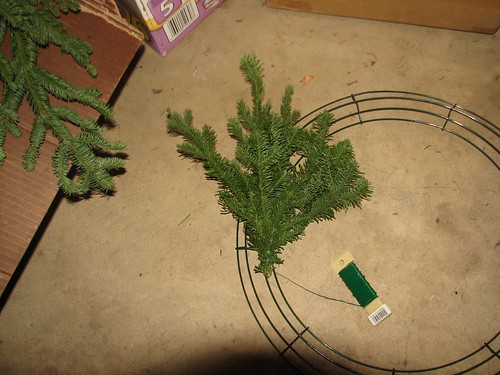
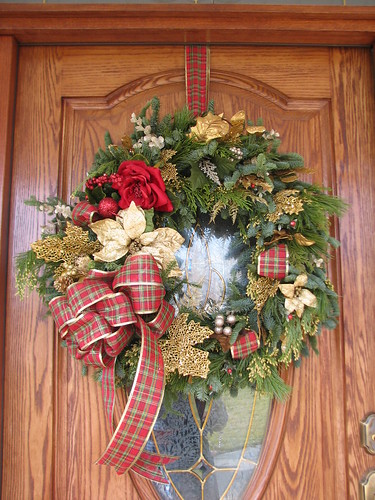
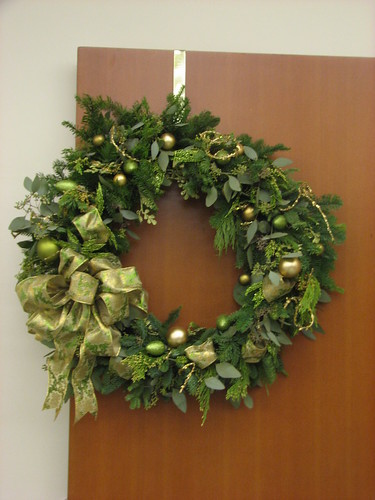
8.)  If you practice that at least 10 times you will find you can do it fast enough to justify prettying up lots of presents this way.  (and anything else that needs a bow - like my wreaths... and these bows are the base of most corsages.)

And now you know.....

Friday, December 17, 2010

teacher gifts

Sir O's preschool teacher and his two teachers at church are each getting a custom apron, designed by Sir O himself.

teacher gift

 This is called the "one-trip-to-the-craft-store-with-all-three-kids-all-by-myself" wonder-gift. Just a canvas painter's apron and some fabric markers. I ironed after he finished coloring to set the ink, and voila! In an ideal world I would have sewed the aprons myself, but seriously? That would require two hands, and when do I ever have discretionary use of both hands?

Thursday, December 09, 2010

Round two - in the cold

I seized an opportune moment yesterday and got my extra wreath made.  It was late in the evening and I had to work out in the garage, so by the time I was done my fingers and toes were numb with cold.  I started out taking photos along the way, but toward the end I was just trying to hurry and finish so I could scour my hands and go inside to thaw out.

But briefly, to begin you need a wreath form, either one like this:
wreath making - first bundle
or like this:
starting the wire for Evergreen wreath
(the single hoop is much easier to work with, but harder to find)

You also need some florist wreath wire, about 22 gauge.

The other thing you need is your greens.  Noble fir is ideal for Christmas wreaths and smells great.  You can incorporate just about any evergreen or eucalyptus.  You wouldn't want to use anything that will die or brown quickly, unless you're using it in a dried state.  Cut your greens in 5-10inch lengths and sort them by type so you can easily see what you have left and spread your varieties through the wreath evenly.

You need to first anchor the end of your wire on the form so it doesn't slide around.  You will need to pull the wire extremely taut, so it needs to be secure.  Then begin wiring your greens on in bundles of 3.  wrap the wire around each bundle (and around the form at the same time) at least 6 times, and pull it tight enough that the wire cuts into the branches a bit.  How closely you overlap your bundles will determine how full (or flat) your wreath lays.  Every 8-10 bundles hold your wreath form up to make sure your bundles are wired tight enough.  If they are not then they will slump into the center with gravity. (and you'll be making a table centerpiece instead of a wreath).  When you complete  your circle you need to tie off and secure your wire before cutting it off.  (with the double form you go around the inner circle first, then the outer - this is trickier because the wire spool has to be slipped between rings each  time you wrap.)

wreath making - 10th bundle

Once the greens are completed you just hang it up and embellish.  If you want to re-use your embellishments then wire them in.  If not, they can just be affixed with hot glue.  I am cheap so I never glue anything. And most craft stores have their Christmas picks and sprays on sale right now, so it's a good time to pick up embellishments.  Don't be afraid to cut them apart with wire cutters and spread their sparkliness around.  Most artificial sprays are made on a wire base, so the individual flowers, stems, and leafs can be manipulated quite a bit.

IMG_7929

The finished wreath should be kept in the coolest environment possible to last as long as possible.  (Outside on a front door is ideal)   Occasionally misting it with water can help lengthen it's life as well.

See, that's not so very complicated!

Tuesday, December 07, 2010

Oh, Christmas Wreath

I had a blast at my wreath-making class at Red Butte Garden last night.  It felt terribly good to be manipulating plant matter again.  But the best part?  I finally had an experience in a class where I was fast and proficient.  After so many classes of feeling the panic of being behind, I finally finished first.  My wreath was constructed early, so I had plenty of time to have fun embellishing.

My Wreath

I had originally intended to take lots of photos of all the different steps.  The problem is that working with conifers means having hands covered in sap.  Not hands you want to touch your camera with.  (And I already gave this wreath away, so I can't even take more photos of it) But I brought home enough leftover greens to make another wreath, so hopefully I can stop and wash my hands often enough to document the process better.  Oh, and I found out that orange pumice scrub (the kind auto mechanics use) works great for getting pine and eucalyptus sap off of ones hands. I love learning things I know I will put to use!
Related Posts Plugin for WordPress, Blogger...